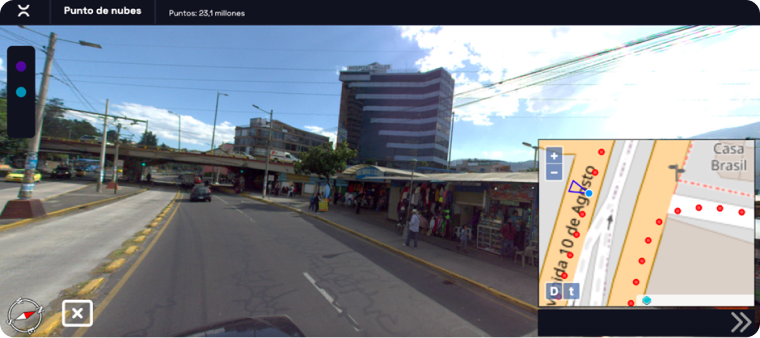
Step 8: Using the mini map tool
Within the previously uploaded point cloud file, you can have access this tool located at the bottom right:

1. Mini map
When displayed it shows you a mini map with information that details the following:
The box seen in blue indicates the area where the point cloud is located, it will provide you additional information, so you can more clearly identify the geographical area where the point cloud was taken.
As you zoom in, you will begin to notice red dots, each of them representing a 360 photograph.
2. 360 photograph
If you click on any point on the mini map, the 360 photograph can be displayed and viewed.


Step 2: Creation and assignment of user accounts

Step 3: Upload data

Step 4: Upload 360 images

Step 5: Running the artificial intelligence

Step 6: Use of different tools